






Sprouted seeds take only 5 days to prepare. Personally, I have eaten them every day for decades, and frankly, it is one of the simplest habits I know. It was even at the heart of the creation of Biovie in 2007, because our first activity was making the Easygreen sprouter.
Lacking energy? Looking to enrich your diet with truly nutritious foods, without breaking the bank or spending hours in the kitchen? Sprouted seeds are probably the answer you were waiting for. As an ISTOM engineer (tropical agronomy) and a passionate follower of living food since 2007, I can assure you that sprouting seeds at home is within everyone's reach. Here is everything you need to know to get started.
What is a sprouted seed?
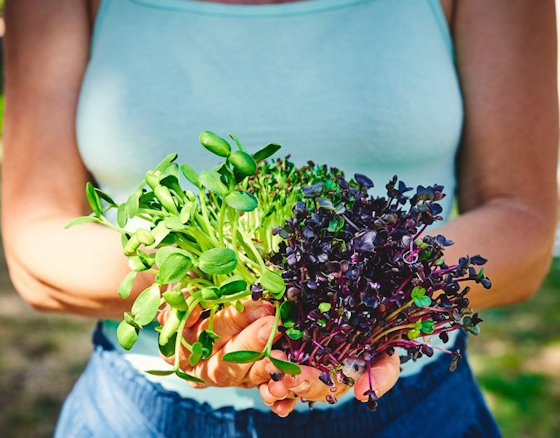
A sprouted seed is simply a seed that has started its process of turning into a plant. This biological awakening, triggered by water and warmth, mobilises the reserves the seed had set aside to give birth to a new plant.
Germination in 3 steps
In nature, for a seed to become a plant, it waits patiently for the optimal conditions to wake up and set in motion all the necessary biological and enzymatic processes.
- Soaking: the seed absorbs water and comes out of dormancy
- Germination: the sprout pierces the husk and starts to develop
- Growth: the first leaves appear, this is the optimal stage for eating
This process takes only 2 to 7 days depending on the variety. In practical terms, you can have fresh sprouted seeds on your table in less than a week. Incidentally, quinoa is THE fastest seed to sprout.
Why germination transforms the seed
The first condition for this awakening to happen is the presence of water. As soon as the seed is soaked, the enzyme blockers are released. One of the main blockers is phytic acid, scientifically considered an antinutrient because of its ability to form insoluble complexes with micronutrients such as iron, magnesium, zinc and copper.
Once soaking takes place, the seed reduces its phytic acid content and several transformations occur:
- Complex proteins are broken down into amino acids
- Complex sugars become simple sugars
- Enzymatic activity is multiplied by 6 to 20
Why they are called "biogenic" foods
The word comes up often in living food, and it deserves to be explained rather than repeated. A biogenic food is a living food, capable of generating life: the sprouted seed is the typical example, since it is literally in the process of becoming a plant when you eat it.
In concrete terms, what happens during germination is nothing mystical: the seed mobilises its reserves, its enzymes are activated, proteins and starch are partly pre-digested, and the antinutrients that blocked the absorption of minerals decrease.
What germination changes in the seed
Reduction of phytic acid
Germination reduces phytic acid content by 56 to 76% according to studies carried out on fenugreek.
Share this article
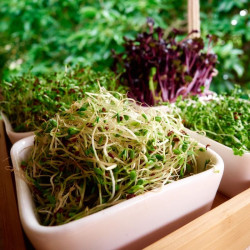
Organic alfalfa seeds for sprouting
€2.80 BACK IN STOCK ON NOVEMBER 19
An alkalising effect on the body
Which seeds should you sprout?
The ideal seeds to start with
If you are a beginner, I recommend starting with these three varieties, which are easy to sprout and mild in taste:
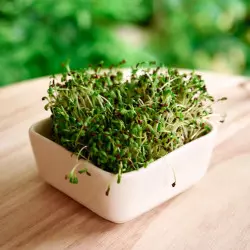
- Alfalfa (lucerne): discreet, slightly sweet taste, sprouts in 5 to 7 days, ideal for salads and sandwiches, with a good density of vitamins and minerals made assimilable by germination. Discover our organic alfalfa seeds
- Green lentils: mild flavour and crunchy texture, sprouts in 2 to 3 days
- Fenugreek: slightly spicy taste, sprouts in 3 to 4 days, traditionally associated with digestive comfort as part of a varied and balanced diet and a healthy lifestyle. See our fenugreek seeds
These seeds forgive beginner's mistakes and give satisfying results even without prior experience. For the complete list of seeds to sprout, see our article Which seeds can you sprout? The complete list by category.
Three other common seeds
Here are three other seeds that are easy to find:
- Sunflower: nutty taste. Sunflower seeds for sprouting
- Chickpeas: firm texture, excellent in salads
- Mung beans (green soy): the famous bean sprouts
Mucilage seeds (special technique)
Some seeds produce a mucilage (gel) on contact with water and cannot sprout in a standard jar. They require a sprouting tray:
- Flax: mucilage seed
- Chia: mucilage seed
- Watercress: peppery flavour
- Rocket: pronounced taste, excellent for lifting dishes
The full range Sprouted seeds
Biovie offers 24 varieties of organic sprouting seeds, produced since 1896 by our Italian supplier Geo Bavicchi, and every batch is tested before it goes on sale (germination rate above 95% required). Radish, fenugreek, sunflower and alfalfa sprout the fastest and most easily for beginners, in 3 to 5 days on a windowsill. To discover several varieties without making a mistake, the packs (The 3 Radishes, The Essentials, The Pep's Seeds...) are a good starting point, before choosing your varieties individually. The range also covers microgreen seeds to grow on a substrate, and sprouters to get started without unnecessary equipment., 46 products
Discover the full range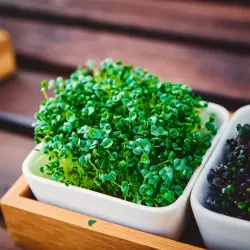
Summary table: which seed for which use
An overview of taste, difficulty and timings to choose at a glance, across our most requested varieties:
| Seed | Taste | Difficulty | Soaking | Germination time | Keeping time in the fridge | Product page |
|---|---|---|---|---|---|---|
| Alfalfa (lucerne) | Mild, fresh, slight pea taste | Easy | 6 to 8 h | 4 to 6 days | 5 to 7 days | See the product page |
| Broccoli | Slightly peppery, close to a mild radish | Easy | 6 to 8 h | 4 to 6 days | 5 to 7 days | See the product page |
| Mung bean | Fresh and crunchy, very neutral | Easy | 8 to 12 h | 3 to 5 days | 4 to 6 days | See the product page |
| Fenugreek | Spicy, curry-like, grows stronger with time | Easy (eat young) | 8 h | 3 to 4 days | 3 to 5 days | See the product page |
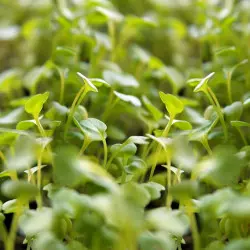
| Sunflower | Hints of hazelnut | Medium (harvest young, before the leaves) | 8 h | 2 to 3 days | 3 to 4 days | See the product page |
| Red clover | Mild, slightly sweet, close to alfalfa | Easy | 6 to 8 h | 4 to 6 days | 5 to 7 days | See the product page |
| Chia | Neutral | Medium (mucilage seed, substrate needed) | No prior soaking, moisten directly on the substrate | 3 to 5 days | 2 to 3 days (fragile) | See the product page |
| Rocket (arugula) | Peppery, sharp | Medium (mucilage seed, substrate needed) | No prior soaking, moisten directly on the substrate | 5 to 7 days | 4 to 5 days | See the product page |
| Red radish | Peppery and pronounced | Easy | 6 to 8 h | 4 to 5 days | 5 to 6 days | See the product page |
| Green pea | Mild and sweet, close to a garden pea | Easy | 10 to 12 h | 3 to 4 days | 4 to 5 days | See the product page |
| Mustard | Very sharp, close to wasabi | Easy | 6 to 8 h | 4 to 5 days | 4 to 5 days | See the product page |
| Barley | Grassy, cereal-like | Easy | 8 to 12 h | 2 to 3 days | 3 to 4 days | See the product page |
Timings and tastes are indicative: they vary with room temperature, the freshness of the seed and your personal preferences. Mucilage seeds (chia, rocket) need a support, a sprouting mat for example, and do not sprout in a simple jar.
Seeds to NEVER sprout
Beware, some seeds are toxic once sprouted and must never be eaten:
- Tomato: contains toxic solanine
- Aubergine: same solanine problem
- Pepper: likewise, a toxic nightshade
- Rhubarb: contains oxalic acid in dangerous quantity
So there you go, this list is important to keep in mind. If in doubt about a seed, do not sprout it.
Sprout them yourself or buy them ready-made?
Both have their merits, but not for the same reasons. Sprouting at home costs a few cents a portion, guarantees absolute freshness and leaves you in charge of the variety: in exchange for two minutes of attention a day. Buying ready-to-use sprouts saves that time, but costs noticeably more and assumes an impeccable cold chain: shop-bought sprouts travel, and their freshness is a matter of days.
Our advice: start with a jar and an easy variety, alfalfa or lentil. If the habit takes hold, an automatic sprouter removes the chore of rinsing and lets you run several varieties in parallel.
Common mistakes to avoid
After years of practice and of passing on what we know to our customers, here are the mistakes I see most often:
- Too many seeds: seeds swell a lot, never fill more than a third of the jar
- Insufficient rinsing: twice a day at least, otherwise there is a risk of mould
- Poor draining: stagnant water is enemy number one, tilt your jar well
- Temperature too high: ideally between 18 and 22°C, avoid heat sources
- Poor quality seeds: always use certified organic seeds intended for sprouting
Hygiene and food safety
The essential precautions
Frankly, with quality organic seeds and rigorous hygiene, the risks are minimal. Indeed, the vast majority, if not all, of the problems are linked to transport issues. Since 2011, the French Association of Sprouted Seed Producers (AFPGG) has put strict controls in place. ANSES also notes an "absence of previous French outbreaks linked to industrially produced sprouted seeds".
Here are the golden rules:
- Use certified organic seeds, specifically intended for sprouting
- Always wash your hands before handling your seeds
- Clean your sprouting equipment regularly
- Rinse your seeds twice a day
- Eat your sprouted seeds within 5 to 7 days. Rinse them every day if you keep them in the refrigerator once sprouted.
Optimal storage in the refrigerator
Sprouted seeds keep in the refrigerator in a slightly open container to allow air circulation (above all, no closed container!). They stay fresh for 5 to 7 days. Beyond that, they lose freshness.
How to include sprouted seeds in your daily life
The beauty of sprouted seeds is their versatility. Here are a few ideas that Aurélie and I put into practice every day:
- At breakfast: add them to your smoothies or on your toast
- In salads: they bring crunch and freshness
- In sandwiches: replace the lettuce with sprouted seeds
- On soups: add them at the last moment to keep their crunch
- As a side: a handful next to your main dishes
The recommended amount is 2 to 4 tablespoons a day (30 to 50 g), for a trifling cost.
To go further into living food, also discover our articles on activated almonds and spirulina.

In short
Sprouted seeds are probably the best value for money in living food. For a few cents, you get a fresh, living food.
The routine is disarmingly simple:
- Day 1, evening: soaking (2 minutes)
- Days 2 to 4: rinsing morning and evening (1 minute a day)
- Day 5: harvest and enjoy
For thousands of years, sprouted seeds have accompanied humankind. The Essenes made their famous Essene bread with sprouted seeds.
Try it and you will adopt it! Start with alfalfa or lentils, you will be surprised how easy it is. And if you would like to explore the subject further, do not hesitate to read our other articles on living food.
FAQ, Your questions about sprouted seeds
How long does it take to sprout seeds?
Germination time varies from 2 to 7 days depending on the variety. Lentils sprout in 2 to 3 days, while alfalfa takes 5 to 7 days. Most common seeds are ready in less than a week.
Which sprouted seeds should you choose to start with?
For your first experiments, I recommend alfalfa, green lentils and fenugreek. These seeds are easy to sprout, have a mild taste and forgive small handling mistakes: this is always where we steer new Biovie customers who ask us for advice.
Are sprouted seeds dangerous?
With certified organic seeds and rigorous hygiene (rinsing twice a day, clean equipment), the risks are minimal. Since 2011, the AFPGG has put controls in place for seeds intended for sprouting.
Can you sprout seeds without a sprouter?
Absolutely. A simple glass jar with a piece of gauze held by a rubber band is enough to start. Exception: mucilage seeds (flax, chia, watercress) require a specific sprouting tray.
How many sprouted seeds should you eat per day?
The recommended amount is 2 to 4 tablespoons (30 to 50 g) a day. This amount remains reasonable for daily consumption.
What happens inside the seed during germination?
During germination, the seed's enzymatic activity is multiplied by 6 to 20 and its phytic acid content decreases (-56 to -76% according to studies on fenugreek).
Which seeds should you never sprout?
Nightshade seeds (tomato, aubergine, pepper) and rhubarb are toxic once sprouted and must never be eaten. If in doubt about a seed, refrain from sprouting it.
A varied and balanced diet and a healthy lifestyle are important.
Is sprouted ginger toxic?
No: when ginger sprouts in the kitchen (a green eye growing on the rhizome), it is not the same phenomenon as the germination of seeds described in this article, and it is not toxic in itself. The real precaution concerns ginger that has become soft, mouldy or greyish: in that case, it is better to throw it away rather than eat it.
Are sprouted seeds not recommended for some people?
As with most vegetables eaten raw, particular caution is recommended for pregnant women, young children, older people and immunocompromised people: it is better for them to rinse sprouted seeds well, check their freshness, or even steam them briefly before eating. For the rest of the population, quality organic seeds and rigorous hygiene are more than enough.
Going further
- The mung bean
- What is the best sprouter for sprouted seeds?
- Sprouting chart for sprouted seeds
- Discover sprouted watercress seeds
- Sprouted leek seeds
- Azuki bean: sprouting and recipes
- Sprouted broccoli seeds
- How to rinse sprouted seeds easily?
- Sprouted green pea salad recipe
Recipes with this product
- Fuchsia pink hummus with beetroot and sprouted chickpeas
- Buddha bowls with raw sprouted chickpea falafel
- Nori rolls with sprouted seeds and pink beetroot sauce
- Young shoots salad with orange vinaigrette
- Raw bars with sprouted buckwheat, dates and cacao
- Collard green wraps with sprouted quinoa and miso sauce
Updated: November 2026. Article validated by Éric Viard, founder of Biovie and ISTOM engineer, co-author of "Algues au quotidien" (Gallimard, 2024), Best Cookbook in the World, Gourmand Cookbook Awards 2025, and Best Cookbook in France, Académie Nationale de Cuisine 2025.


Which seed for which use?
Once you are past the first jar, the question becomes: which one to continue with? Here is how we guide our customers, according to what they are looking for.
Regularity matters more than quantity: one to two tablespoons a day, every day, are worth more than a big portion now and then.
Depending on who eats it: guiding the choice
The choice depends not only on the goal, but also on the person, and above all on their palate. A few pointers from what we hear at the counter.
There is no bad seed, only seeds badly chosen for the person who eats them. Start with the one whose taste you like: it is the only one you will sprout a second time.
The three families of seeds to sprout
Not all of them are grown in the same way, and this is the number one cause of sprouting failures.
How to sprout your seeds in 5 days
Germination is child's play. Here is a step by step process to succeed with your first sprouted seeds.
The equipment you need (with or without a sprouter)
To get started, you do not need to invest in expensive equipment. A simple glass jar with a piece of gauze or tulle held in place by a rubber band is more than enough.
If you want to equip yourself for regular production, a tiered sprouter will let you sprout several varieties at once, more conveniently. We make, by the way, the Easygreen Sol sprouter, the only low tech autonomous sprouter in the world that works without electricity for a week thanks to an ingenious system using gravity and the siphon effect.
Step 1: soaking
This soaking is fundamental because it triggers the germination process and reduces part of the phytic acid.
Step 2: daily rinsing
Rinsing literally takes 30 seconds. That is all you have to do: 1 minute a day in total.
Step 3: exposure to light
After 2 to 3 days, when the sprouts start to appear, expose your seeds to indirect light. This allows the shoots to turn green.
Avoid direct sunlight, which could dry out your seeds.
Step 4: harvesting and the final rinse
When your sprouted seeds have reached the desired size (generally 1 to 5 cm depending on the variety):
And there you go, your sprouted seeds are ready to enjoy!